Rss Feed Like Us on facebook Google Plus
Showing posts with label windows. Show all posts

May 26, 2014

Can’t Create File In The C Drive Root Directory – Windows

PROBLEM : while developing a java application or any windows application,writes a program to create a file in c drive but getting an error "Access Denied"Try to create an empty file in the C drive root directory manually, but no options to create any files, only new folder is allowed, although The logged in user is under administrator group.

SOLUTION


In Windows 7 or 8 (may be Vista), users (even administrators) are not allowed to create files in the C drive root directory, otherwise, an error message like “A required privilege is not held by the client” or  “access is denied” will be prompted.
To fix it, just turn off the User Account Control (UAC). In Windows 8, do not turn off the UAC via control panel, it must go through the registry.
  1. Press keys “Windows Key + R”, type regedit
  2. Locate HKEY_LOCAL_MACHINE\SOFTWARE\Microsoft\Windows\CurrentVersion\Policies\System\EnableLUA
  3. Update the EnableLUA value to 0 (turn if off)
  4. Restart Windows.


Alternatively
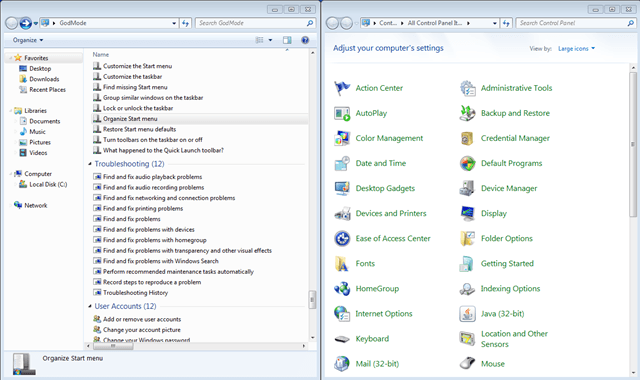
1. Go to control panel >> user accounts >> user account control settings >> set to never notify


2. If you think it’s not safe to turn off the UAC feature, then create a new folder under the C drive root directory and put the file inside.
C:\folder\your-file.txt - OK
C:\your-file.txt - NOT OK


Read More

December 10, 2013

Object Error in Internet Explorer (IE- 7,8,9,10,11)


While opening Internet Explorer you are getting the Object Error in a popup window, this error may come while opening a new web page or between surfing a website.


Issues:
1.most add-ons are not compatible with the 64 bit version of ie
2.Many dysfunctional addons from various utilities will effect the internet explorer
3.Security suites Privacy features/ Toolbars 
4. unwanted addons ,toolbars

Solution:

Here are the few steps to resolve this problem, please follow these steps to automatically resolve it.

Step 1.  Uninstall Unwanted Toolbars from add/remove program

Example:-
privacy safe gaurd,Social Privacy,unfriend checker,Price peep today,Coupon amazing,We-Care Toolbar

Step 2. Disable all addons except from Microsoft

goto Tools >> Manage Add-Ons
or you can use this MS fixit utility.

Step 3. Reset Internet Browser Setting

goto Tools >> Internet options >> Advanced tab 

Click on Reset Button and Restore Advance Setting button


Restart your Browser/System then check. your problem should be resolved.


Read More

September 20, 2013

Error: no such partition - "Grub rescue" , while booting the system

error: no such partition

grub rescue>

CAUSE:
1. If you delete the Linux partition on your hard drive and windows partition is still there.  When you boot the system you will get the following message:
error: no such partition
grub rescue>

2. when you  try to make partition of C Drive

Solution

Insert windows 7 disk and
1 Now from the menu list select the ‘Command Prompt’ option.
2) At the DOS prompt type the following three commands:
bootrec.exe  /fixmbr
bootrec.exe  /fixboot (may return an 'Eliment not found' message)
bootrec.exe  /RebuildBcd
3.) Close the command prompt window and click the ‘Startup Repair’ option.
4. ) The repair process may take some time, so wait until the process completes at which point you will see two messages “Windows cannot repair this computer automatically” and “Startup Repair cannot repair this computer automatically”.

These messages are the result of the radical changes made by removing the other drive. Ignore the Send/Don’t send options.

6.) Close this message window by clicking on the X in the upper right corner of the Send/Don’t send window. Next click on the ‘View advanced options for system recovery and support’ option and from the main menu once again click ‘Startup Repair’. 

This time the repair process may only that a few seconds and when prompted “Startup Repair could not detect a problem”, click ‘Finish’  and run the ‘Startup Repair’ option one more time, click ‘Finish’, and then remove the System Repair DVD and click ‘Restart’.  Reboot the computer.

Read More

September 5, 2013

Unable to load SQL Server OLEDB Provider Resource DLL

Problem :  While accessing any window application follwing error may occur: SQL
Server OLEDB provider support error Unable to load SQL Server OLEDB provider resource DLL. The application cannot continue.

Solution:

  1. Following the steps below may help to resolve the issue.
  2. Open My Computer 
  3. Double Click C (Local Disk) 
  4. Double Click Program Files 
  5. Double Click Common Files 
  6. Double Click System
  7. Double Click OLE DB 
  8. Check that the following files are listed: SQLOLEDB.RLL andSQLOLEDB.DLL
  9. If the files are not listed they will need to be copied from another machine


Read More

August 29, 2013

Error 0x80070522: A required privilege is not held by the client.

This Problem occurs when you copy files to c drive or any other drive. the error message comes and you are not able to copy files.

or any window software not able to generate files in C drive...
This issue might occur permissions are not set properly for the C Drive.
Make sure that you are logged in as Administrator.

To take ownership of C Drive, follow these steps:
  • Right-click the C Drive and then click Properties.
  •  Click the Security tab.
  • Click Advanced, and then click the Owner tab.
  • In the Name list, click your user name, or click Administrator if you are logged in as Administrator, or click the Administrators group.
  • Click on Edit and then put a check mark against "Replace all existing inheritable permissions on all descendants with inheritable permissions from this object".
  • Click OK, and then click Yes when you receive the following message:
  • This will replace explicitly defined permissions on all descendants of this object with inheritable permissions from C-Drive (C:).
  • Do you wish to continue?
  • Once the permissions are replaced, click on OK.
  • Check if you are able to copy, paste or delete any documents now.

OR you can try the steps below

If the above steps fail then you may also want to disable UAC and check if that helps.
  • Click Start, type msconfig in the start search box, and then press Enter.
  • If you are prompted for an administrator password or for a confirmation, type the password, or click Continue.
  • Click the Tools tab.
  • Click Disable UAC and then click Launch.
  • A command window appears, and shortly thereafter, a notification bubble appears informing you that UAC is disabled.
  • Click OK and restart your computer to apply the change.
OR you can try this (it will definitely solve your problem)
  • Reboot into Safe Mode.
  • Log on as Administrator.
  • Click Start
  • Type the three letters cmd
  • Press Ctrl+Shift+Enter
  • Run the process as Administrator.
  • Type the following commands and press Enter after each:

    takeown /f c:\ /a /r /d y
    cacls c:\  /t /c /g administrators:F  System:F  everyone:F
    (Answer "yes" when prompted "Are you sure?")


The commands will make you the owner of drive C: and will give full access to everyone to all of its folders.

Read More

August 13, 2013

WMI failed to connect to local computer : error code 0x8007007e

 WMI failed to connect to local computer or you are unable to get the pahysical information of the system like mac addrss, ip address etc...
it is run by a dll file called -  wbmiscripting.dll
To resolve the problem follow these steps.....
1. Log onto Windows with an administrator account, click Start, type services.msc in the Start Search box
and press Enter.
2. In the right pane of the Service console, locate and right-click Windows Management Instrumentation, and then select Stop to stop the service.
3. Start Windows Explorer, and then locate the %SystemRoot%\System32\Wbem\Repository folder.
4. Backup and delete all the files in the %SystemRoot%\System32\Wbem\Repository folder.
5Restart the computer.
The files that were deleted will be re-created when the computer restarts.
Note: The Windows Management Instrumentation service starts automatically when you restart the computer.
If the issue persists, please re-register WMI DLL files and re-compile WMI mof files to check if the issue can be resolved. Here are the detailed steps:
Start cmd as administrator

Copy and paste
cd %windir%\system32\wbem press enter
after then copy and paste
for /f %s in ('dir /b *.dll') do regsvr32 /s %s press enter
after then copy and paste
for /f %s in ('dir /b *.mof') do mofcomp %s press enter
after then copy and paste
wmiprvse /regserver press enter

ReStart the Windows Management Instrumentation service .
Read More

June 14, 2013

GOD MODE Control Panel for Windows 7

Windows 7 has a vast amount of settings that can be configured to adjust how Windows
operates. However, adjusting these settings is not the easiest thing to do. The majority of them must be adjusted using the Control Panel, found at the path Start > Control Panel.
Although the Control Panel is a good tool, it can sometimes be difficult to use. For the most part, when using Control Panel, you must toggle back in forth between numerous different windows to setup everything. This can be a pain when trying to find a specific setting that you want to configure.
However, there is one other way that you can adjust settings on your Windows 7 computer, which gives you all adjustment options in one place… Windows 7 “God Mode”.
To get to your Windows 7 “God Mode” settings, you need to first create a new folder on your desktop. To do so, right click on your desktop to bring up the secondary menu. From the secondary menu, choose New > Folder. This will add a default folder to your desktop which will be named something like New folder, or New folder 2, etc…
Next, you need to change the name of the New folder that you just created. Right click on the folder and select Properties from the drop down menu. Under the first tab, General, you will see a text box with the name of the folder. Type the following code into the text box to change the name of the folder:
GodMode.{ED7BA470-8E54-465E-825C-99712043E01C}
After you are done, click the OK button to close the folder Properties window. Now, the folder should have changed from the default blank folder icon to a Control Panel looking icon.
Double click on the “God Mode” icon to open it up. You will notice that it looks similar to the Control Panel window, with all options placed in list format. This is a great way to see all the available adjustments for Windows 7 in one spot.
Now, you can jump to a certain setting and configure it easily, without having to go through a bunch of different Windows. When you click on a listing within the “God Mode” window, you will be able to go straight to the adjustments.
God Mode Window
Note the differences between the Control Panel and “God Mode” panel.
control panel God mode
If you prefer not to use God Mode, but would like to have a folder/direct link to the Control Panel on your desktop, that can easily be done as well. Click the start menu button, roll your cursor over the Control Panel link, right click, and select Show on Desktop from the secondary menu.
That’s all there is to it, that is how you use Windows 7 “God Mode”, an easy way to adjust all settings for your computer in one convenient place.
Read More

March 21, 2013

Configure Outlook Express in Your Windows

E-mail configuration for outlook express --
To set up your Outlook Express client to work with G E-mail configuration for outlook Gmail:
    1. Enable POP in your email account. Don't forget to click Save Changes when you're done.
    2. Open Outlook or Outlook Express.
    3. Click the Tools menu, and select Accounts...
    4. Click Add, and then click Mail...
    5. Add mail account
    6. Enter your name in the Display name: field, and click Next.
    7. Enter your full Gmail email address (username@gmail.com) in the Email address: field, and clickNext. Google Apps users, enter your full address in the format 'username@your_domain.com.'
    8. Enter username
    9. Enter pop.gmail.com in the Incoming mail (POP3, IMAP or HTTP) server: field. Enter smtp.gmail.com in the Outgoing mail (SMTP) server: field. Google Apps users, enter the server names provided; don't add your domain name in this step.
    10. Enter server names
    11. Click Next.
    12. Enter your full email address (including '@gmail.com' or '@your_domain.com') in the Account name: field. Enter your email password in the Password: field, and click Next.
    13. Enter account name and password
    14. Click Finish.
    15. Highlight pop.gmail.com under Account, and click Properties.
    16. Highlight account
    17. Click the Advanced tab.
    18. Fill in the following information:*
      • Check the box next to This server requires a secure connection (SSL) underOutgoing Mail (SMTP).
      • Enter 465 in the Outgoing mail (SMTP): field.
      • Under Outgoing Mail (SMTP), check the box next to This server requires a secure connection (SSL).
      • Under Incoming mail (POP3), check the box next to This server requires a secure connection (SSL). The port will change to 995.
      • Highlight account
      *The order of Outgoing and Incoming mail server fields varies by version. Make sure you enter the correct information in each field.
    19. Return to the Servers tab, and check the box next to My server requires authentication.
    20. Highlight account
    21. Click OK.
    Congratulations! You're done configuring your client to send and retrieve Gmail messages.
Read More

© 2011-2016 Techimpulsion All Rights Reserved.


The content is copyrighted to Tech Impulsion and may not be reproduced on other websites.